So here are a few pictures.
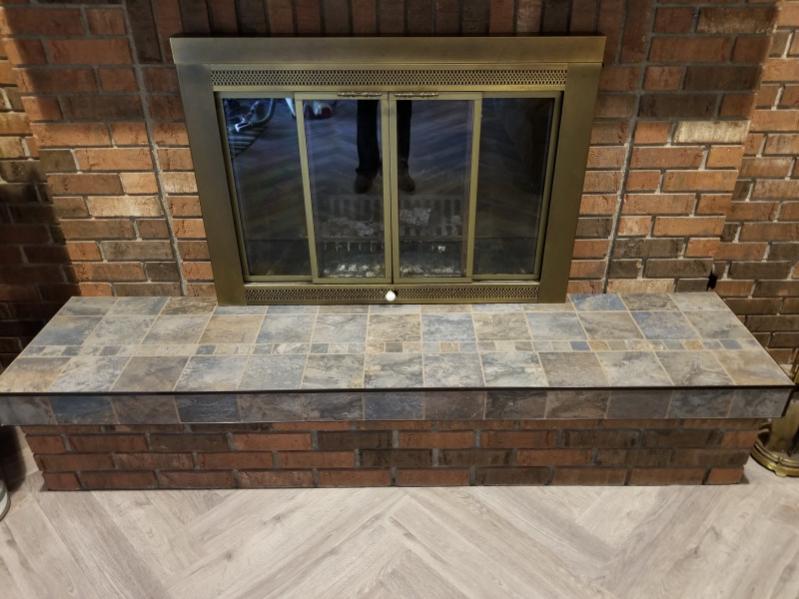
This is the hearth I made to replace the concrete slab we removed. I put the old fireplace doors on until we find some new ones.
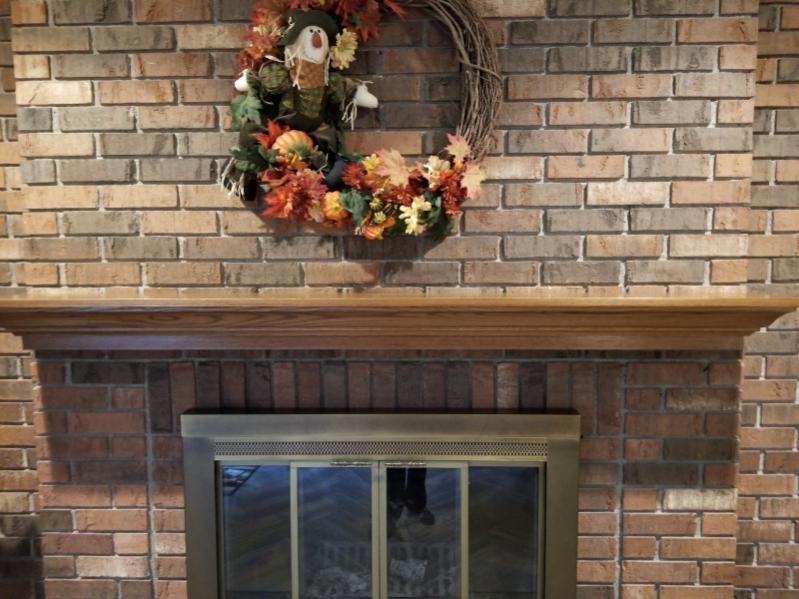
Oh, this is the mantle our son made several years back. He worked for a guy that made custom furniture and cabinetry until he got a real job. There was a nasty looking rough cut pine mantle there before. We removed that and slid this one onto the 2 posts imbedded in the brick.
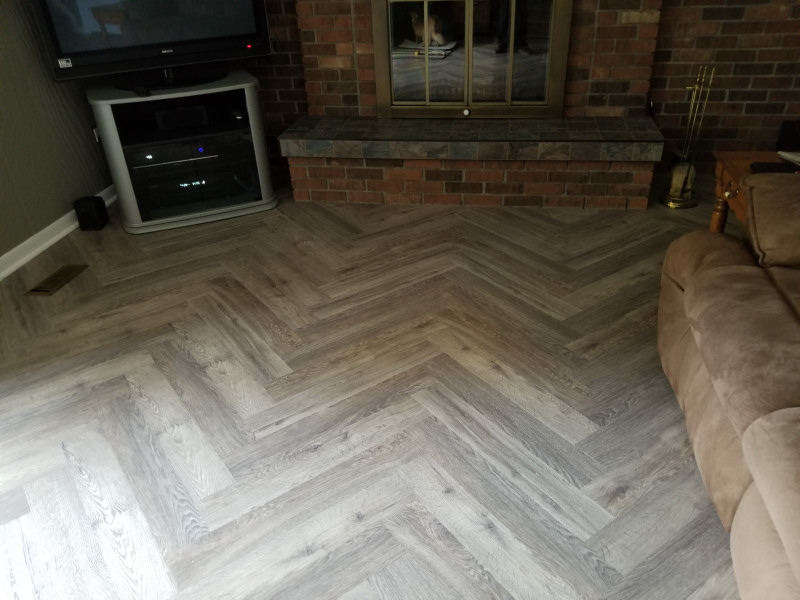
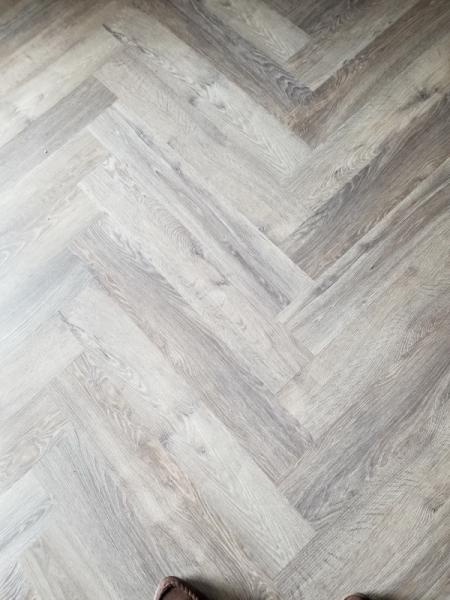
Here are a couple pictures of the floor. It does have gray tones in it but there is a little more brown than what shows in these pictures. Also can't really see the surface has an imposed wood grain surface, not a smooth surface.
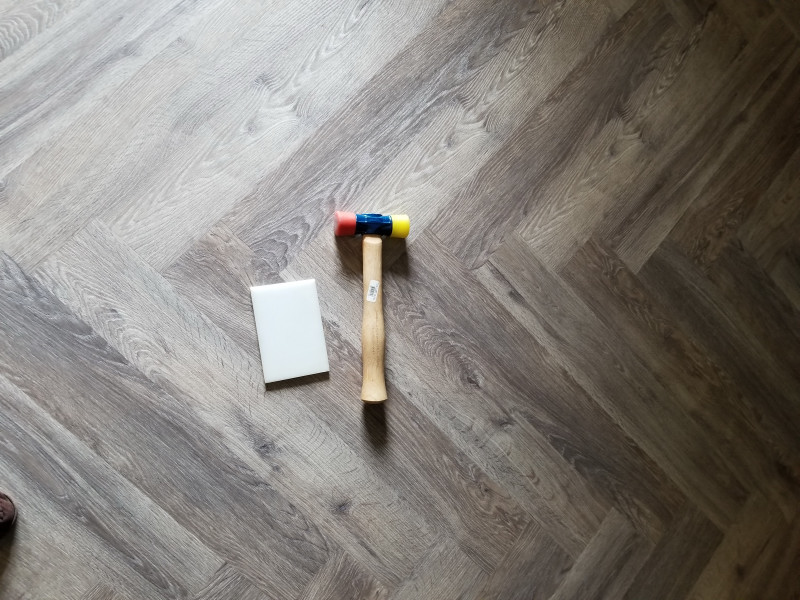
This is the dead blow hammer I used to beat this floor together. You definitely need one for this type of floor. Actually this is a 12oz hammer, a 16oz or 24oz one would be better. There is also a 1/4" thick piece of nylon I used as well. Most laminate flooring is click-lock, slide one piece into the other at an angle then push it down to lock them together. That doesn't work with the herring bone pattern. The planks have a bottom lip with a round groove in it on 2 sides. The other 2 sides have a top lip with a rounded rib. Half of the carton are A planks, bottom lip on the top and right side, bottom lip on the other 2 sides. The other half of the planks, B planks, have the bottom lip on the top and left side.
You lay one plank over the other and smack it down to lock them together. Most of the time they go together pretty well. Sometimes, if the subfloor isn't perfect, you really have to smack it to get a smooth joint. That's where the junk of nylon came in. I stood it on end along the joint and smacked it. That directed the force where I needed it. Don't worry, you can hit this flooring as hard as you want and it won't leave a mark. I assume if you used a steel hammer it might but not with the nylon faced hammer.
I'm impressed with the engineering and construction of the flooring. The joints are invisible once you get them smacked them down tight. I lucked out on the size of this room. I have 3 full columns, A and B planks, from end to end. Then a half column of A's one side and B's on the other. If the room had been an inch wider I would have had to use another carton and a half to reach the side walls. Basically cut off a little triangle to fill in then throw the rest of the board away.
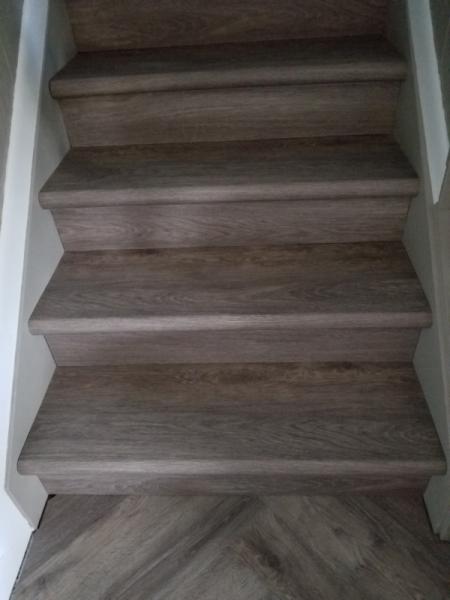
Oh, here are the steps that go up to kitchen/main floor. The flooring is from HD and you can get matching step treads and faces for just about any flooring they sell.
So for now I just have to paint and install the 1/2 round along the baseboard. TV, furniture, fireplace doors, floor registers, etc. can wait unti after the new year. I have a TV, blue-ray player and surround sound system along with a love seat and recliner, oh and a can a of beer. I'm good for now.